I’ll never forget the time I pulled my snowboard out of the loft in mid-December, buzzing for the season to start. That buzz quickly turned into a very un-festive four-letter word when I saw the state of it. Rust had crept across the edges like ivy, the base looked like it’d spent six months in a gravel pit, and the bindings… well, they barely moved. I’d chucked it up there the previous spring with zero thought—wet, un-waxed, still crusted with mud and lift ticket stickers. Classic.
That painful lesson stuck. I’d basically murdered my own gear with laziness. The worst part? It wasn’t even old. That board could’ve done at least another three seasons. Instead, I spent the week before my trip panic-buying a replacement and forking out more than I care to admit. Since then, I’ve taken storage and cleaning seriously—and my gear’s lasted years, not months.
If you’ve ever opened a ski bag in autumn and recoiled at the smell, or realised your boots have gone stiff and mouldy, you’ll know the feeling. It’s easy to think “I’ll sort it later” when you get home from the slopes. But that five minutes of procrastination can cost you a fortune down the line.
This isn’t about being fussy. It’s about keeping your kit sharp, dry, and ready to ride. Whether you’re a weekend warrior or a snow addict chasing fresh pow, treating your gear right makes a massive difference. It performs better. It lasts longer. It doesn’t reek. And it won’t leave you stranded in resort rental queues when you should be bombing it down a black run.
This guide covers everything. Skis, snowboards, boots, helmets, gloves, jackets—the lot. We’re talking real-world advice, no fluff, no jargon, and absolutely no more heartbreak when you open your gear bag next winter.
Let’s sort it properly this time.
Timing Is Everything: When To Clean And Store Your Winter Sports Gear
It might feel tempting to lob everything into the garage the moment your plane touches down from Geneva or Innsbruck. But the timing of your cleaning and storage routine makes a world of difference—not just for hygiene, but for the longevity of your equipment.
Right After the Trip vs. End of the Season
Ideally, you should clean your gear after every trip, even if it’s just a long weekend in Chamonix. Dirt, moisture, and salt from roads or artificial snow can cause early corrosion or breakdown of materials. If you wait until the season’s over, you’re likely letting grime sit and do its worst for weeks or months. That’s how boots start to smell like death and ski edges end up rusted to bits.
That said, full end-of-season maintenance is still needed even if you’ve been good about post-trip cleaning. This is when you get into long-term storage prep, not just a basic wipe-down.
Best Time of Year for Deep Maintenance
Late spring is your sweet spot for a full clean and service. You’ll have a better idea of wear and tear after your final trip, and ski shops often offer end-of-season tune-up deals in April and May. Plus, cleaning your gear now means it’s ready to go the minute the first snow falls—no last-minute faff.
Why Timing Matters for Storage Conditions
Putting wet or dirty gear into storage is a bit like sealing a sandwich in clingfilm and leaving it on the radiator. Mildew, rust, and bad odours thrive in enclosed spaces with trapped moisture. Your best bet? Clean, dry, and store everything once temperatures are mild and humidity’s low—think late April to early June in the UK.
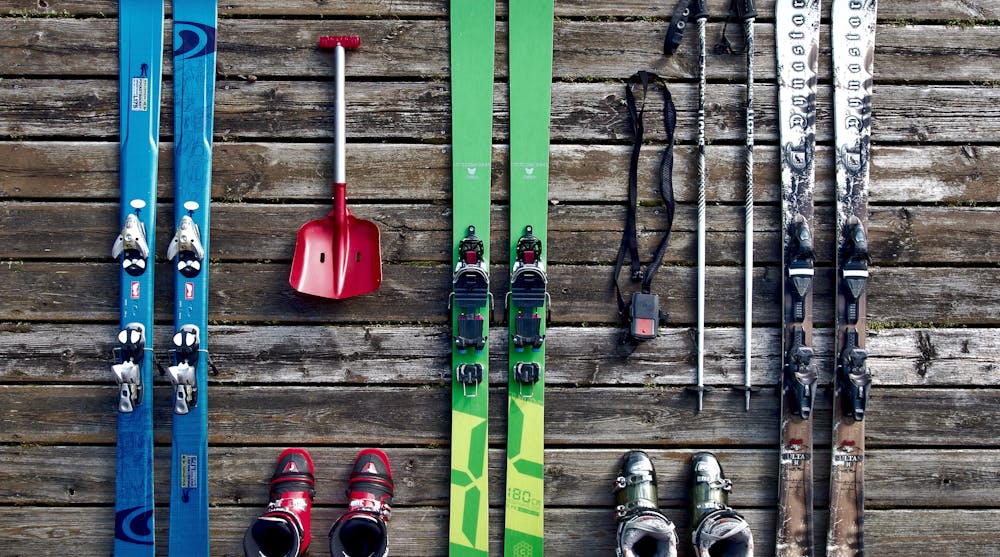
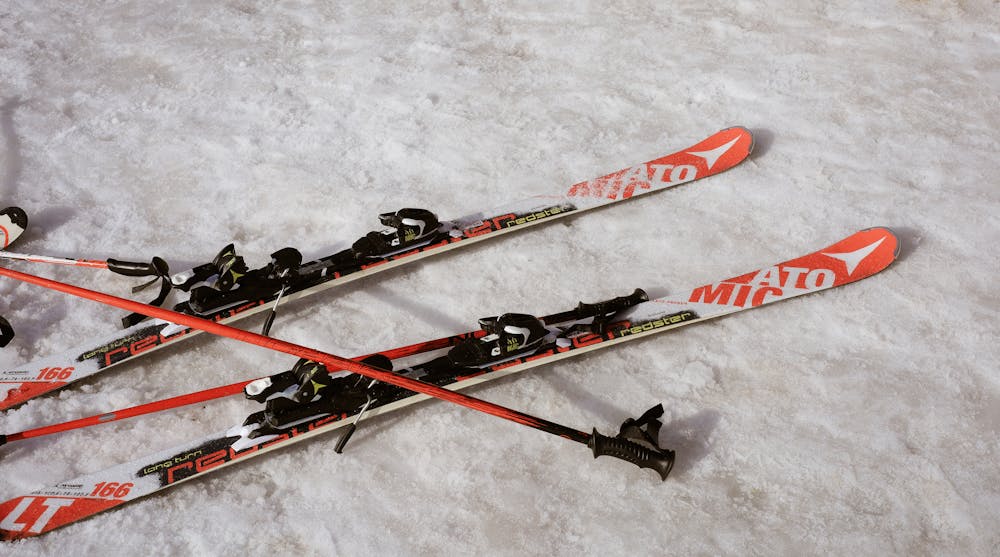
Skis And Snowboards: Detailed Cleaning And Storage Strategies
Skis and snowboards are tough, but they’re not invincible. Base damage, rust, and binding corrosion can all creep in if you’re not careful. Here’s how to give them proper TLC.
Step-by-Step Cleaning Process
- Remove any stickers or lift passes. Use citrus-based goo remover or a dab of rubbing alcohol.
- Scrape off old wax with a plastic scraper—especially if you hot-waxed it mid-season.
- Use a base cleaner (citrus-based or dedicated ski base cleaner) and a clean cloth to remove grime, oil, and residue.
- Check for core shots or base damage. If you see exposed fibreglass or wood core, take it to a technician for repair.
- Examine the edges for rust or burrs. Minor rust can be removed with a gummy stone or fine-grade sandpaper (600–1000 grit).
Waxing For Storage
This is key. Hot waxing your base before storage prevents it from drying out and oxidising. But don’t scrape it off! Leave the thick coat on—the wax acts like a sealant for both base and edges.
Use an all-temperature hydrocarbon wax unless you’re super fussy about snow temp ranges. Iron it on as usual, but skip the scraping step. Let that layer sit until next season.
Binding Care
Snowboard bindings and ski bindings both need a proper once-over:
- Tighten screws and check for cracks in plastic or metal parts.
- For snowboards: Loosen the screws and store the bindings off the board if you’re not riding for months.
- For skis: Leave DIN settings alone unless your weight or skill level’s changed—just make sure bindings are dry and rust-free.
Storing Boards And Skis Properly
- Store them vertically or on their sides—never flat on the ground.
- Use ski ties to prevent brakes or bindings scratching each other.
- Keep them in a dry, room-temperature space. Avoid sheds, garages, or attics that fluctuate in temperature and humidity.
- Don’t bag them up in non-breathable plastic. Use a fabric ski bag if needed, but leave zips open slightly to let air circulate.
Boots: Cleaning, Drying And Preventing Odours
If there’s one bit of kit that turns nasty the quickest, it’s your boots. Whether we’re talking ski boots or snowboard boots, these things get sweaty. Neglect them and they’ll repay you with a pungent cloud next season.
Cleaning the Outside
- Use a damp cloth with mild detergent or specialised boot cleaner to wipe down the plastic shell or synthetic exterior.
- Don’t soak them—just enough to shift salt and grime.
Inside the Liners
Most modern ski and snowboard boots have removable liners. Always take them out.
- Air dry them fully—never near direct heat like radiators, as it can warp the shape.
- Sprinkle bicarbonate of soda inside if they’re pongy, and vacuum it out after a few hours.
- For gnarly odours, use a boot deodoriser spray, or insert cedar wood shoe trees—they absorb moisture and smells.
If liners aren’t removable, use a boot dryer or stuff with newspaper and change it out every few hours until fully dry.
Inspect and Maintain Hardware
- Check buckles, laces, and BOA systems for fraying or sticking.
- Apply silicone lubricant to buckles or hinges if needed.
- If soles are worn, consider getting them replaced—especially ski boots with GripWalk or ISO 5355 soles that are safety-critical.
Storing Boots The Right Way
- Buckle them loosely (not fully tight) to maintain shape.
- Store upright in a cool, dry space—never dump them in a gear bag and forget about them.
- Avoid extreme cold or heat. Garage floors and lofts are some of the worst places for boot longevity.
Jackets, Salopettes, and Base Layers: Proper Outerwear Care
Snow gear takes a beating—sweat on the inside, snow and grit on the outside. But unlike your board, you can’t just give your jacket a scrub with a wire brush and call it a day. Treat your technical clothing right and it’ll keep performing for years.
Washing Waterproof Outerwear (Shells & Insulated)
Most snow jackets and trousers are made with technical fabrics—GORE-TEX, Dermizax, HyVent, or other waterproof-breathable membranes. Standard detergent will wreck the DWR (Durable Water Repellent) coating, so don’t just chuck them in with your jeans.
Do this instead:
- Use a specialist wash like Nikwax Tech Wash or Grangers Performance Wash.
- Wash on a gentle cycle at 30°C.
- Rinse twice if needed to remove residue.
- Don’t use fabric softener. It clogs the waterproof membrane and kills breathability.
Restoring Water Resistance
Once clean, apply a DWR treatment while the gear is still damp:
- Use a spray-on or wash-in DWR restorer (Grangers, Nikwax, etc.).
- Tumble dry on low heat for 20–30 minutes to ‘set’ the treatment—if your care label allows.
Base Layers and Mid Layers
Merino wool, synthetic thermals, fleece tops—they all benefit from proper washing:
- Avoid bio detergents for merino; go for wool-safe options.
- Turn garments inside out.
- Air dry to maintain fit and elasticity. Avoid hot dryers.
Smelly base layers? A cold vinegar soak before washing (1:3 ratio with water) will kill bacteria. Let them air out fully before packing away.
Storage Tips
- Hang up jackets and trousers; don’t fold or cram them into boxes.
- Use fabric garment bags if storing in wardrobes for long periods.
- Keep base layers in breathable cotton bags or drawers—not plastic tubs that trap moisture.
Gloves, Socks, Neck Warmers, and Beanies: Small Items, Big Smells
The soft stuff often gets overlooked—but it’s also the first to stink and mould if left damp. Your gloves and socks are probably the sweatiest things you wear after a big day on the hill, yet most people shove them in a bag and forget they exist until the next season.
Gloves
There are two types to deal with here: synthetic waterproof gloves and leather gloves or mitts.
Synthetic Gloves:
- Hand wash with warm water and Tech Wash or a gentle detergent.
- Squeeze out water without wringing.
- Dry flat, fingers facing up.
- Don’t put them on a radiator—they’ll lose shape and the inner lining may shrink.
Leather Gloves:
- Wipe the outside with a damp cloth.
- Treat with a leather balm or waterproofing wax (like Hestra Leather Balm).
- Never soak them.
- Stuff them lightly with newspaper to hold shape while drying.
Inner Liners (if removable): Wash these separately—machine-washable liners can go in a mesh bag at 30°C.
Socks and Base Accessories
- Use a non-bio detergent to keep technical fibres intact.
- Wash at 30–40°C.
- Air dry—don’t tumble, especially for compression socks or wool blends.
Top Tip: Wash socks inside out to get rid of dead skin and built-up bacteria. It’s gross, but it works.
Storage for Accessories
- Keep gloves flat and dry in breathable boxes or fabric bins.
- Avoid vacuum sealing—natural fibres like wool need to breathe.
- Store neck warmers and beanies in a clean drawer with lavender sachets or cedar blocks to fend off moths and smells.
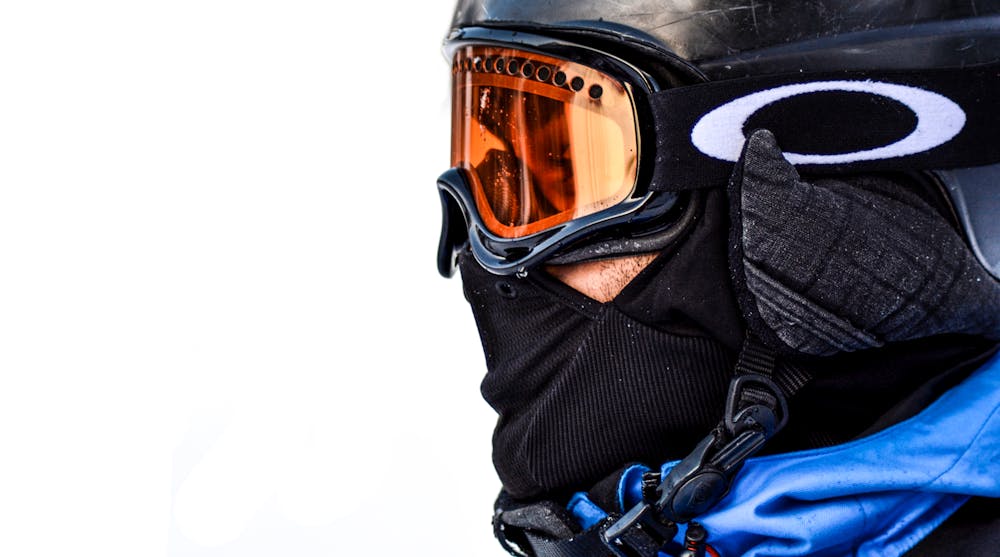
Helmets and Goggles: Keep Vision Sharp and Heads Safe
These two bits of kit are easy to damage with good intentions. One wrong move and you’re looking at foggy lenses or compromised head protection. Here’s how to clean them without doing harm.
Helmets: Cleaning and Storage
Exterior:
- Use a damp cloth with mild soap—no harsh chemicals or alcohol-based wipes.
- Focus on areas with stickers, goggle strap grime, or sweat lines.
Interior Padding:
- If removable, take it out and hand wash with mild detergent.
- Rinse thoroughly and air dry completely before refitting.
- If fixed, spray lightly with helmet-safe fabric cleaner and wipe with a damp cloth.
Straps and Buckles:
- Wipe down with soapy water.
- Check buckles and adjusters for cracks or stiffness—these can fail without warning.
Storage:
- Store your helmet in a soft helmet bag (often provided when purchased).
- Keep it on a shelf or in a cupboard, not in a gear bag or garage floor.
- Avoid high heat—polycarbonate shells and EPS foam can degrade.
Goggles: Don’t Scratch or Smear the Lenses
Goggles are delicate. The inside of the lens often has an anti-fog coating that’s not scratch-proof.
Cleaning Tips:
- Don’t wipe the inside of the lens when wet—it’ll ruin the anti-fog layer.
- Let goggles dry completely, then use a clean microfibre cloth to gently dab the inside.
- Wipe the outside only with a microfibre cloth.
- For stubborn grime, rinse with lukewarm water and shake off excess before air drying.
Straps and Foam:
- Check for mildew, stiffness, or crumbling foam. If the foam’s degraded, it’s time to replace the goggles.
- Straps should still stretch without fraying—if they’re crusty or cracked, bin them.
Storage:
- Always store in a goggle case or soft bag—no exceptions.
- Keep away from direct sunlight, which can warp the lens or cause discolouration.
- Never leave goggles in your helmet; they’ll press against the foam and lose their shape.
6. Storing Your Gear for the Off-Season
Packing everything away for the warmer months isn’t as simple as chucking it all in a bin bag and stuffing it under the bed. The right storage setup makes all the difference between fresh, ready-to-go gear and a smelly, mildew-ridden mess come next winter.
Ideal Storage Conditions
You want somewhere cool, dry, and dark. Think airing cupboard, wardrobe, or a well-ventilated loft—not the shed or garage unless they’re insulated.
- Humidity: Keep it low. Moisture encourages mould and rust.
- Temperature: Stable is best. Avoid anywhere that gets boiling in summer and freezing in winter.
- Sunlight: UV breaks down fabrics and plastics—keep everything out of direct sun.
Best Practices for Storing Different Gear
- Skis and Snowboards: Store standing upright or lying flat. Loosen bindings to reduce tension on springs. Avoid hanging by tips.
- Boots: Buckle them loosely to maintain shape. Stuff with newspaper or boot shapers.
- Clothing: Hang outerwear on broad hangers. Store base layers in breathable fabric bags.
- Goggles and Helmets: Store in their own cases. Keep lenses separate from foam to prevent warping.
- Accessories: Use labelled boxes or cotton bags. Never store gloves or socks unless they’re 100% dry.
Smell Control and Pest Prevention
- Toss in silica gel packs or charcoal sachets to absorb moisture.
- Cedar blocks or lavender sachets keep moths away.
- Avoid scented drawer liners or strong oils—they can damage rubber and synthetics over time.
Labelling and Organisation Tips
This is the bit people skip—and regret later.
- Group gear by person or type in stackable crates.
- Use clear boxes if possible, or attach laminated inventory sheets.
- Store frequently forgotten bits like wax kits, tools, lift passes, and gaiters in a “spares” box.
7. What NOT To Do – Common Mistakes That Wreck Gear
You’d be surprised how many clever people do things that quietly ruin their kit. Let’s run through the top offenders so you can avoid throwing money down the drain.
Using the Wrong Cleaners
Dish soap, laundry detergent, bleach—these are death to technical fabrics and waterproof membranes. Same goes for household glass cleaner on goggle lenses.
Stick to: Products made for outdoor gear (Nikwax, Grangers, TOKO, etc.).
Storing Gear While It’s Damp
One wet glove in a sealed bag can grow enough mould to stink out your whole loft. Never pack away anything unless you’re certain it’s bone dry—inside and out.
The worst culprits:
- Boot liners
- Glove fingertips
- Sock toes
- Inner goggle foam
Drying Too Aggressively
Radiators, hairdryers, or tumble dryers on full blast can shrink, warp, or de-laminate materials.
- Boots may become misshapen.
- Outerwear may lose waterproofing.
- Helmet padding can crack or deform.
Use ambient airflow and patience instead. Boot dryers or low-temp tumble dryers (if permitted on the care label) are fine.
Improper Ski/Snowboard Storage
A few bad habits can ruin your edges or warp your board:
- Leaving tension on bindings
- Storing in a hot attic or damp garage
- Letting base wax dry out without summer wax protection
- Using ski straps too tightly (causes camber distortion)
Neglecting Small Repairs
It’s easy to ignore minor issues after your last trip, but they snowball:
- A frayed goggle strap will snap next season.
- Minor delam on a ski tip can split wider.
- Worn boot liners will compress further and destroy foot support.
Take notes post-trip and sort repairs before storage, not after.
8. Long-Term Maintenance Tips and Annual Checks
Treat your ski and snowboard gear like you’d treat a car—it needs an annual service. A little care here saves big cash later and keeps you safe and comfy on the slopes.
Ski and Snowboard Tune-Ups
Even if you’re not riding for months, your edges and bases deserve attention:
- De-burr edges: Use a diamond stone or soft file to knock off nicks from rails and rocks.
- Base fill: Melt in P-Tex to fill any gouges.
- Edge check: Look for rust, especially under bindings and near tips.
- Summer wax: Apply a thick hot wax layer and leave it on—don’t scrape. It prevents base drying and keeps out air.
Come next season, scrape it off and you’re good to go.
Boot Servicing
- Check footbeds and liners: If they smell or feel flat, replace or wash.
- Inspect soles: Worn tread? Many boots have replaceable grip pads.
- Buckles and BOA systems: Make sure everything tightens smoothly.
Some boot fitters offer liner refitting or minor shell punching—perfect time to fix niggling issues before they worsen.
Outerwear Refresh
- Reapply DWR every 12–18 months, even if gear looks clean.
- Check seams, zips, and velcro for signs of failure.
- Mend small tears or frays with fabric patches or send to a specialist repair service.
Helmet and Goggle Lifespan
Helmets don’t last forever—materials degrade, even without impact. Replace every 3–5 years, or sooner if dropped or bashed.
Goggles also wear down:
- Foam hardens or flakes.
- Lenses scratch or lose coating.
- Elastic in straps weakens.
If fogging gets worse despite cleaning, it’s time for a new pair.
Insurance & Inventory
Not glamorous, but useful:
- Photograph all gear and serial numbers.
- Keep receipts and model names.
- Store info digitally in case of theft or travel claims.
9. Gear Lifespan and Knowing When to Replace
There comes a time when even your most beloved snowboard or trustiest boots have had enough. No amount of waxing, patching, or DIY repairs can fix certain issues—and hanging onto tired gear can make your day on the mountain more painful than fun.
Skis and Snowboards
With proper care, most boards and skis last between 80 to 100 full days of riding. That’s roughly 5–8 years for an average snow-holiday goer.
Signs it’s time to upgrade:
- The base dries out quickly, no matter how often you wax.
- Edges feel dull, thin or rusted through.
- Major core shots or delaminated spots are spreading.
- You’ve outgrown the flex, shape or feel of the setup.
If your style or weight has changed, your board might not match your riding anymore. Don’t keep a board that feels like hard work.
Boots
Boots lose support before they fall apart. After 100+ days of riding, liners compress and materials soften, affecting both comfort and control.
Check for:
- A wobbly heel or loose feel even when tightened.
- Flattened liner foam or odd pressure points.
- Cracking plastic or broken buckles.
- Tread worn smooth—especially if you hike a lot.
If you dread putting them on, it’s time.
Bindings
Bindings often outlive boots but still have a shelf life. Expect 5–7 seasons of reliable use, or less with heavy park abuse.
Warning signs:
- Ratchets slip or strip.
- Straps crack or delaminate.
- Highbacks feel flexy or loose.
- Mounting screws won’t tighten snugly anymore.
Don’t wait for them to fail on a powder day.
Helmets and Protective Gear
These have one job—protect your head and body. And they don’t last forever.
- Helmets: Replace every 3–5 years even without impact. One proper crash = bin it.
- Impact shorts, back protectors: Foam degrades with use. Replace if they compress easily or feel too thin.
Outerwear
If you’re patching up your jacket after every trip or reapplying DWR monthly, it might be time to call it. Gore-Tex can’t be resurrected forever.
Watch for:
- Persistent wetting out even after reproofing.
- Zips and seams that fail repeatedly.
- Obvious rips that tape won’t hold.
You deserve to be dry and warm, not soggy and grumpy.
10. Eco-Friendly Cleaning and Disposal Options
Snow sports gear isn’t exactly low-impact, but you can make smarter choices when it comes to cleaning, maintaining, and eventually replacing your kit.
Planet-Friendly Cleaning Tips
- Use biodegradable cleaners like Nikwax Tech Wash, TOKO Eco Textile Wash, or Grangers Performance Wash.
- Spot clean instead of washing whole garments too often.
- Wash in cold water with full loads—less microfibre shedding and less energy use.
- Skip the tumble dryer unless it’s needed to activate waterproofing.
Some products let you re-waterproof gear without heat—check the label.
What to Do With Worn-Out Gear
Don’t just bin it. A lot of gear can be recycled, repurposed, or passed on.
Outerwear and Clothing:
- If it’s still wearable, donate to charity shops or outdoor community groups.
- Some brands offer take-back schemes (Patagonia, The North Face, etc.).
- Cut up non-donatable items for rags or patch kits.
Skis, Boards and Bindings:
- If usable, donate to ski clubs or schools.
- Broken boards can be turned into furniture, shelves, or wall art.
- Metal bindings and poles can often be recycled at scrapyards—remove plastic parts first.
Boots:
- Some cobblers or ski shops accept used boots for parts.
- Worn-out liners can be recycled as foam in some council tips—check local policies.
Helmets:
- Never donate a used helmet.
- Most councils won’t recycle mixed materials, but you can sometimes dismantle the foam from the plastic shell for proper disposal.
Green Upgrade Tips
- Choose gear with recycled materials or PFC-free DWR.
- Buy second-hand from ski swaps or resale apps.
- Repair instead of replace. Use gear-specific patches, boot glues, and seam sealers.
Supporting eco-friendly ski brands or circular services means less waste and guilt all round.
Final Thoughts: Look After Your Kit and It’ll Look After You
There’s nothing like standing at the top of a fresh run with gear that feels just right. No pinching boots, no soggy gloves, no snapped poles—just smooth, stress-free riding.
That doesn’t happen by accident. It comes from a bit of care, smart storage, and knowing when something’s past its best. Whether you’re a one-week-a-year rider or a powder hound clocking 50 days each season, the time you spend cleaning and prepping your gear always pays off.
Keep your board waxed, your boots dry, and your outerwear in decent shape, and you’ll save money, ride safer, and squeeze more joy from every trip.
And who knows—you might even start looking forward to unpacking it all next winter. No mystery smells, no mouldy surprises. Just you, your kit, and the mountains waiting.