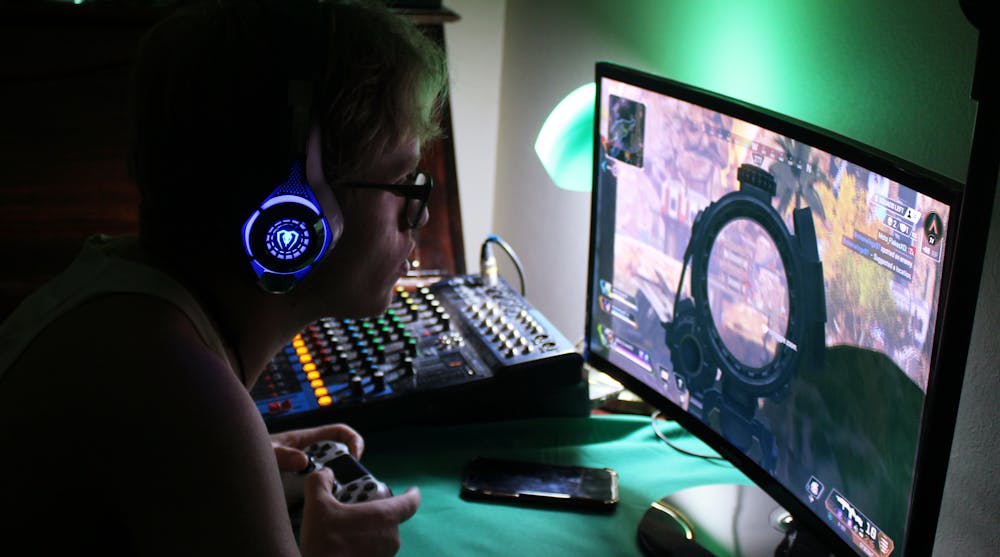
Why Every Gamer Needs To Clean Their Setup (Yes, Even You)
I didn’t realise how filthy my setup had got until my PS5 started wheezing like it had just run a marathon. One minute I’m locked in a sweaty Overwatch match, the next my console sounds like it’s about to lift off.
Turns out, dust and grime are absolute final bosses when it comes to killing your gear.
It’s not just the consoles either. Monitors get smudged, keyboards collect crumbs faster than a dwarf hoards gold in Warcraft, and your once-sleek gaming chair turns into a horror show of old snack spills and sweat patches.
Even your fancy RGB setup isn’t safe – those fans are basically dust hoovers if you’re not careful.
Thing is, dirt doesn’t just look gross. It clogs vents, overheats systems, and straight-up ruins performance.
Nothing ruins a killstreak faster than your PC throttling because the fans are choked with gunk.
Controllers start drifting, keys start sticking, and before you know it, you’re rage-quitting because of your own neglect.
If you treat your gear like loot – the good kind, not the grey junk you sell at vendors – it’ll keep you fragging, farming, and flexing for way longer.

How Often Should You Clean Your Gaming Space? (And Why Respawning Dust Is A Thing)
Let’s be honest: after a marathon session of Elden Ring or a late-night Valorant grind, the last thing you want to think about is housework.
But dust doesn’t care if you’re halfway through a ranked climb. It keeps spawning – and it plays on Legendary difficulty.
Here’s a solid plan that even the laziest MMO tank would approve of:
Weekly ‘Save Points’
Quick wipe-downs to stop the dust getting OP.
- Microfibre cloth over your console and monitor.
- Quick spray and wipe of your keyboard, mouse, and desk.
- Empty any bins you’ve been stuffing with Doritos packets (no judgement).
Monthly ‘Boss Fights’
Go harder once a month.
- Compressed air through console vents and PC fans.
- Proper scrub of your gaming chair.
- Deep clean your headset and controllers.
Seasonal ‘Map Resets’
Every 3-4 months, reset the whole zone.
- Pull the desk out.
- Cable-manage the chaos.
- Hoover the carpet or mop the floor if you’re rocking hard surfaces.
- Check behind the monitor and TV for dust nests big enough to aggro a raid party.
Special Events
You might need extra clean-ups if:
- You’ve got pets (cat fur + gaming rigs = bad combo).
- You’re a heavy snacker (keyboard full of biscuit crumbs? You’re not alone).
- You’re using a VR setup or racing rig that gets heavy physical use.
Think of it like levelling up your gaming experience. Fresh, clean kit gives you fewer headaches, better performance, and let’s be honest, it just feels good knowing your setup isn’t a biohazard.

Your Gaming Cleaning Kit: No Lootboxes Here, Just Essentials
Every hero needs the right gear, and cleaning your gaming setup is no different.
Here’s the proper loadout — no RNG, no pay-to-win nonsense.
- Microfibre cloths: Your basic, common-sense wipe-down weapon. No scratches, no streaks.
- Compressed air can: For blasting dust out of vents, keyboards, and those impossible nooks in your controller. Just don’t get carried away and empty half a can in one go like I did once (bad move).
- Isopropyl alcohol (at least 70%): The ultimate potion for disinfecting without ruining electronics. Make sure it’s pure alcohol, none of that watered-down supermarket rubbish.
- Soft brushes: Think old toothbrush or those tiny cleaning brushes you find in camera kits. Perfect for keyboards and fan grilles.
- Screen cleaner: A specific one for monitors and TVs – they’re touchier than a Dark Souls boss about what chemicals you use.
- Lint-free wipes: For delicate stuff like your VR lenses and high-end monitor screens.
- Vacuum cleaner: Ideally one with a nozzle attachment. You’re gonna need it when you start pulling furniture around.
- Mild soap and water: For cleaning your gaming chair or mousepad (unless you fancy buying a new one every few months).
Pro tip?
Chuck it all into a spare backpack or an old loot crate-looking box. Having it ready to go means you’re much less likely to put cleaning off for “later” — which, in gamer-speak, means “never”.
Cleaning Your Console: PS5, Xbox, Switch And Beyond
Right. Time to save your beloved console from the real threat – not zombies, not Covenant, but dust.
PS5 / PS4
These lads are dust magnets. Pop the plates off your PS5 — Sony actually made it easy, bless them — and use your compressed air gently.
Hoover around the vents, but never shove the nozzle into them.
For the ports, a soft brush is your best mate.
If you’ve got the PS4, be warned: older models get absolutely stuffed with dust. You’ll need patience and gentle fingers.
Xbox Series X/S, Xbox One
Similar story. Focus on the top vent of the Series X — it’s basically a massive dust collector.
A careful air blast here saves you a lot of overheating grief down the line.
Don’t forget the back ports either — that’s where all the unseen carnage happens.
Nintendo Switch
Way more fragile.
Use a dry cloth for the screen and Joy-Cons.
If the dock’s dusty, unplug it and clean with compressed air.
And never, ever spray anything directly onto the console or screen – Switches are stubborn little things, but they’re not invincible.
Handheld Consoles (Steam Deck, 3DS, PS Vita)
Same drill: dry cloth first, then a gentle brush for crevices.
If your thumbsticks feel sticky or weird (Steam Deck players, you know), a tiny dab of isopropyl on a cloth sorts it fast.
Screens And Monitors: Banishing Fingerprints And Smudges
You’ve just nailed a triple kill in COD Black Ops, go to fist pump the air… and leave a greasy print smack in the middle of your screen.
It’s heartbreaking.
Here’s how you fix it — properly.
Step 1: Power Down
Turn the monitor or TV off. Unplug it too. Safety first, even if it feels like waiting for server queues on launch day.
Step 2: Dry Wipe First
Grab your microfibre cloth and lightly wipe the screen to lift dust and dry grime.
Always wipe in a straight line – no frantic circles like you’re buffing your car at Forza speeds.
Step 3: Wet Clean (Only If Needed)
If there are stubborn marks (especially greasy snack fingerprints), spray a little screen cleaner onto your cloth — not the screen itself.
Then wipe gently, like you’re brushing the mane of your prized Elden Ring steed.
Step 4: Edges And Stand
Don’t forget the bezels and base.
They get grimy without you noticing, especially if you’ve got RGB lighting showing every bit of dust like a boss arena spotlight.
And if you’re rocking a dual or triple monitor setup? Yeah, it’s a pain. But you’ll thank yourself next time you’re switching between Apex Legends and Twitch without squinting through a fingerprint maze.

Keyboards, Mice, and Gamepads: Getting Your Hands Back to Their Best
Keyboards
You’re typing out commands in Dota, pulling off insane combos in Street Fighter, or typing out a victory message in Rocket League.
Then, you remember your keyboard is a sticky, crumb-filled mess, and you wonder how long that chip has been wedged between the G and H keys.
Step 1: The Dry Wipe
Start with a quick dry wipe to lift surface dirt. Grab that trusty microfibre cloth and run it over every key. Pay attention to edges — crumbs can get lodged in those spots. If you’ve got a mechanical keyboard, you’ll notice these crumbs can mess with key presses over time.
Step 2: The Deep Dive
Pop off the keycaps (only if you’re feeling brave) using a keycap puller, or you can do it gently with a flat tool. Once they’re off, use a brush or a can of compressed air to blast out anything stuck under the keys.
If it’s time for a major cleanup, dip a cloth in warm water with a drop of mild soap and gently clean the keycaps.
Be sure they’re dry before popping them back on.
Step 3: The Mouse
Your mouse? A sweaty, fingerprint-laden mess that’s more often found on eBay after a bad gaming session.
Wipe the whole thing down with a microfibre cloth. For the sensor, give it a light brush with a soft paintbrush. That’s it. Simple.
Don’t forget to clean the mousepad too – grimy surfaces can mess with the glide, and that’s just not cool when you’re trying to line up the perfect snipe in Call of Duty.
Step 4: Controllers/Gamepads
Your controller has seen it all — from intense Fifa button-mashing to being thrown across the room in sheer frustration.
A wipe with isopropyl alcohol for the exterior gets rid of sticky residue and any germs (because who doesn’t snack while gaming?). For the thumbsticks, give them a light clean with a slightly damp cloth, then dry them immediately.
Pro tip: Never dunk your controller in water. No one needs to be reminded of the havoc of a submerged controller after an accidental spill. Keep it dry, and you’ll keep it working.
Gaming Chairs: The Forgotten Battle
How many hours have you spent in your chair, grinding out XP in World of Warcraft or racing to the top of the ranks in Valorant?
It’s no surprise your chair ends up looking like it’s been through a battle of its own.
Step 1: Start With The Surface
Your gaming chair probably sees some serious action, and that means stains.
Start by vacuuming the chair. Upholstery can collect crumbs, pet hair, and dust. Use a nozzle attachment and get in all the creases.
For faux leather or fabric chairs, a damp cloth with mild soap does wonders for wiping down the surface. Just make sure you don’t soak the chair — no one wants soggy cushions.
Step 2: Cleaning The Wheels And Armrests
Wheels are probably the dirtiest part of the chair, especially if you’re rolling around on carpet. Remove any hair or threads from the wheels. If you’ve got grime stuck in the crevices, a toothpick can work wonders to gently scrape it out.
Armrests? Wipe them down with a microfiber cloth or isopropyl alcohol. They get touched the most, so cleaning them regularly helps prevent oils and dirt from building up.
Step 3: The Cushion
If your chair’s got a removable cushion, wash it (according to the manufacturer’s instructions). For non-removable cushions, a good spot-cleaning with a damp cloth works. You can also use fabric cleaner for fabric chairs, but always test a small area first to make sure it doesn’t leave marks.
Cleaning Headsets, VR Gear, and Microphones: Clear Sound, No Dirt
Gaming headsets, VR gear, and microphones tend to be ignored when cleaning time comes. They sit there, collecting oils from your skin, hair, and even your breath, affecting performance and comfort.
Step 1: Headset Earpads
Your earpads — your trusty companions during those intense raids — can get a bit grimy after all those hours. Use a damp cloth and some mild soap to clean the pads, or simply wipe them with a disinfectant wipe if you want something quicker. Avoid using anything too harsh or wet that could damage the padding.
If you’ve got removable ear cushions, give them a gentle scrub with soap and warm water, but allow them to dry fully before reattaching.
Step 2: Cleaning The Mic
The mic is one of the most neglected parts of a headset, yet it’s what makes you sound crystal-clear during those squad-based operations.
Start by wiping it down with a clean cloth. If it’s foam-covered, give it a delicate rinse in warm water. If you use a headset with a built-in mic (like a gaming headset for PS5), try to avoid getting the microphone wet at all costs. A light disinfectant wipe will usually suffice for cleaning it.
Step 3: VR Headset Lenses
VR headsets get downright gross after long sessions, with fingerprints and sweat left behind.
Always start by wiping down the lenses with a soft, dry cloth (microfibre works wonders here). If the lenses have smudges that won’t budge, use a lens cleaning solution that’s designed for delicate optics. Never spray cleaner directly on the lenses.
For the straps and outer casing, a mild soap solution and a clean cloth work wonders. Don’t use abrasive cleaners that could scratch or damage the materials.
Cabling, Desk & Floor Areas: The Hidden Clutter You Can’t Ignore
Cables: The Silent Game-Wreckers
Behind every perfect gaming session, there’s a tangled mess of cables. From the HDMI cable running from your console to the TV, to the power cables beneath your desk, cables are the usual culprits of clutter.
Step 1: Tidy Those Cables
First, unplug everything. Yes, it’s annoying, but it’s worth it. Start by wiping down all your cables with a dry cloth, removing dust and grime. If they’re particularly grimy (like your controller cables or headset), use a dampened cloth — but never soak them.
Step 2: Cable Organisation
Invest in some cable ties or cable organisers. Wrapping cables into neat bundles and securing them with clips helps reduce the mess. If you’re going all out, you could grab a cable management box or use cable sleeves to hide the chaos.
For the real pros, a desk with built-in cable management is a game-changer. It keeps cables hidden, and your gaming zone stays clean.
Step 3: Desk Surface
Your desk is the battlefield, the hub of all action. And trust me, it gets messy. Once you’ve got your cables sorted, grab your cleaning supplies and wipe down the surface. Depending on your desk’s material, either a damp cloth with a mild cleaner or a simple dry cloth will do the trick.
Step 4: Floor Area
The floor often gets forgotten, but it’s one of the first things you see when you step into your gaming space. Vacuum the area around your desk, especially if you’ve got a carpet — nothing kills the vibe more than rolling your chair over dusty ground. You’ll also want to pick up any loose bits of trash or snack crumbs that may have escaped your reach during epic gaming sessions.
General Maintenance Tips: Keeping Your Gaming Setup Clean, Always
It’s all well and good cleaning once in a while, but true pro gamers know that maintenance is key.
1. Regular Clean-Ups
Set aside time each week or month to give your setup a good once-over.
Every few weeks, a full wipe-down of your gaming gear should do the trick. For daily upkeep, a quick once-over with a microfibre cloth for your screen, keyboard, and console will keep everything in good shape.
2. Ventilation is Your Friend
Always keep your gaming gear well-ventilated.
Dust accumulates quicker when air circulation is poor. Make sure vents are clear, and never block the exhaust fans on your console or PC. If you’re gaming for extended periods, even a quick ventilation check can save you overheating issues.
3. Protecting Your Setup
Consider getting screen protectors for your monitor and TV. They’re not just for looks — they’ll stop dust from sticking to the screen in the first place. And keep your gaming area clean by wiping down frequently used surfaces (like your gaming desk) to prevent dust build-up.
4. Clean Gear, Better Performance
Clean gear performs better. A clean mouse or keyboard ensures better clicks, less delay, and more responsive movement in-game. You’ll notice the difference next time you’re playing high-speed games like Apex Legends or trying to clutch a win in Fortnite.
5. Avoid Over-Cleaning
Don’t go overboard with cleaning every time you sit down. While regular maintenance is crucial, over-cleaning can wear down sensitive components. Give your gaming gear some breathing room, and don’t clean it after every single session unless necessary.
Final Thoughts: A Clean Setup for Maximum Gaming Performance
A well-maintained gaming setup isn’t just about aesthetics – it’s about performance, comfort, and longevity. By cleaning your gear regularly, you’re making sure it functions at its best, whether you’re grinding out in Warzone or taking a break with Animal Crossing.
Your gear is an investment, and keeping it in top condition ensures that it’ll continue to serve you for many epic gaming sessions to come. A clean console means fewer overheating issues, a tidy desk means better focus, and a fresh headset means clear communication with your squad.
Just remember – it doesn’t have to be a lengthy, once-a-month ritual. A few simple habits here and there will keep your gaming space in top shape, without the need for marathon cleaning sessions. And with your setup looking fresh and functioning better than ever, you’ll have no excuse for not climbing those leaderboards.
So, let’s get back to the grind — and this time, with a cleaner, sleeker setup at your side.